Quarkus on APPUiO
9. December 2019
With the release of Quarkus 1.0.0, Java has once again become attractive for microservices. In this blog post I show you how to run native applications on APPUiO using Quarkus. This is a guest article by Michael Gerber form nxt Engineering GmbH.

Create a Quarkus Project
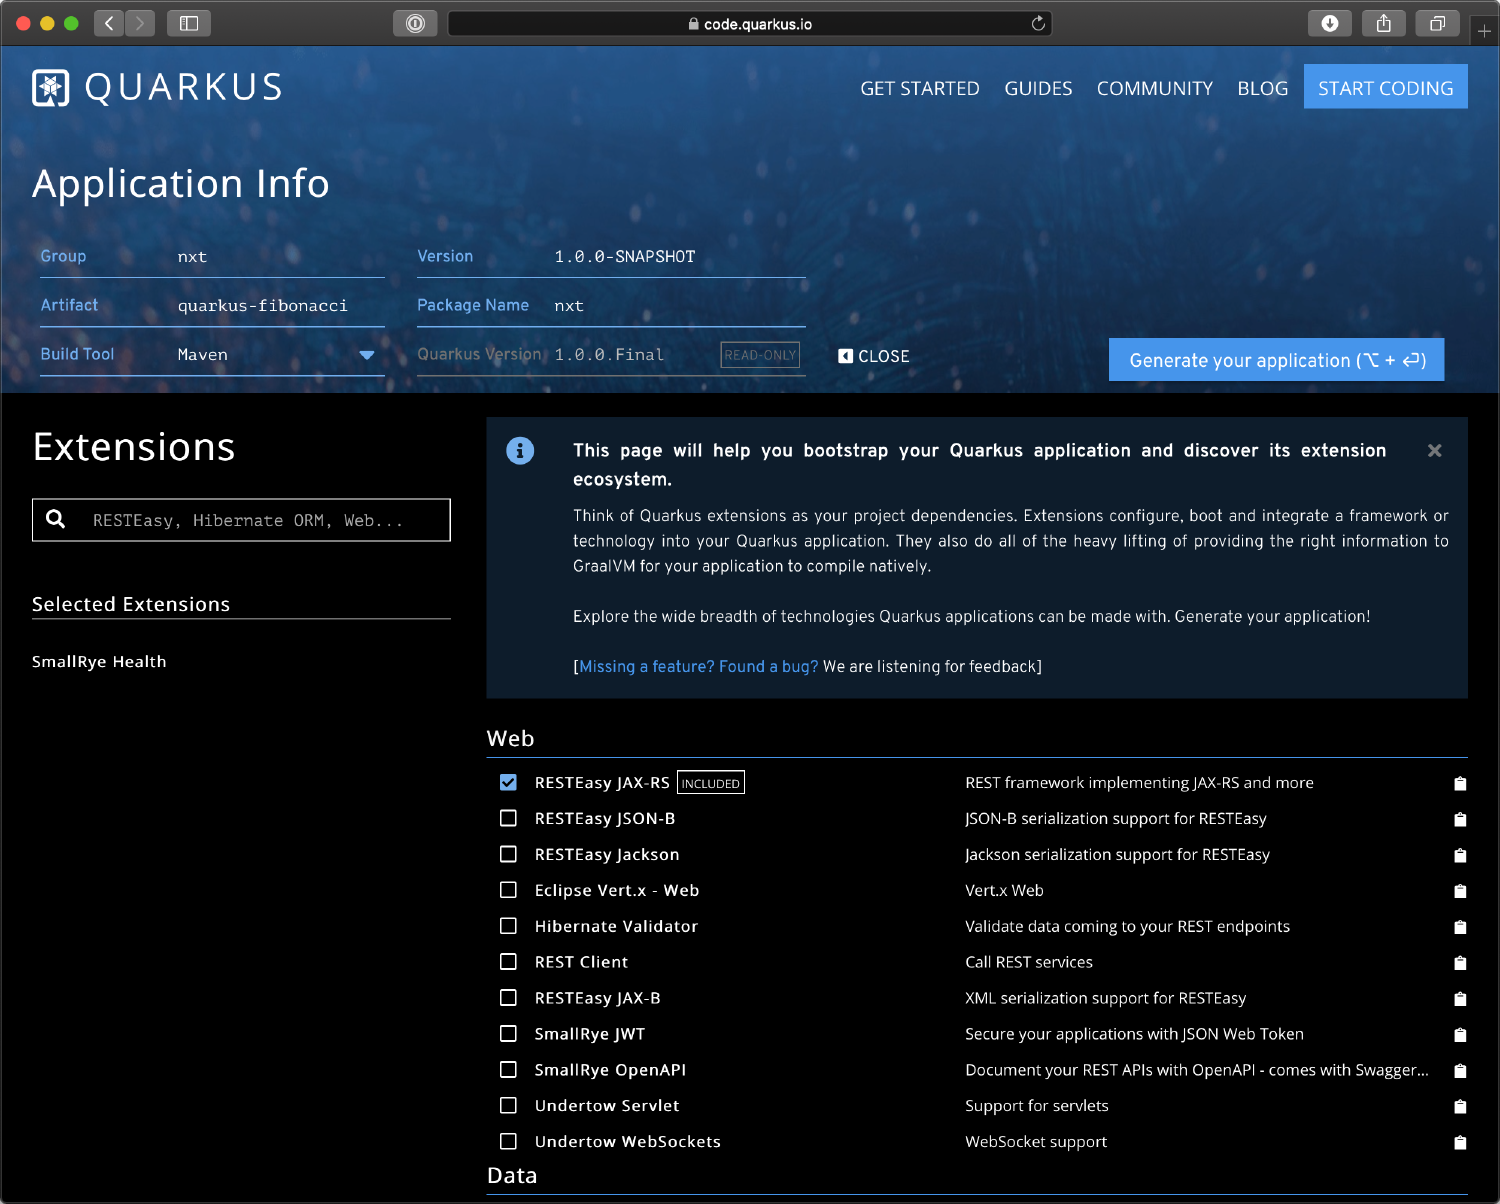
The easiest starting point to create a Quarkus project is the website https://code.quarkus.io . The same concept is already known from Spring Boot https://start.spring.io . This makes it easy to create a project with the needed libraries.
 For this example choose the extensions RESTEasy JAX-RS and SmallRye Health. RESTEasy JAX-RS, which is included as default, is used for REST web services and SmallRye Health is an extension that helps to integrate health checks.
Start the Application
To start Quarkus locally you just need to have Java 8 installed. With the command ./mvnw compile quarkus:dev you can start the application in development mode. Changes in the Java code are applied directly in the running application via hot deployment. Thus, a time-consuming application restart is not necessary 😃.
Create a REST Web Service
As an example application, we develop a REST web service that calculates a specific number in the Fibonacci sequence . The sequence is named after Leonardo Fibonacci , who described the growth of a rabbit population in 1202. The Fibonacci sequence can be calculated recursively as well as iteratively. To push the CPU a little bit, I use the recursive variant.
package nxt;

import javax.ws.rs.GET;
import javax.ws.rs.Path;
import javax.ws.rs.PathParam;
import javax.ws.rs.Produces;
import javax.ws.rs.core.MediaType;

@Path("/fibonacci")
public class FibonacciResource {

    @GET
    @Produces(MediaType.TEXT_PLAIN)
    @Path("{number}")
    public int fibonacci(@PathParam("number") Integer number) {
        if (number == 0) {
                return 0;
        }
        if (number == 1) {
                return 1;
        }
        return fibonacci(number - 2) + fibonacci(number - 1);
    }
}
The application can be tested with curl as follows:
curl http://0.0.0.0:8080/fibonacci/10
Test a REST Web Service
Quarkus uses the well-known library REST-assured for REST web service tests. The web service created earlier can be tested with the following code:
package nxt;

import io.quarkus.test.junit.QuarkusTest;
import org.junit.jupiter.api.Test;

import static io.restassured.RestAssured.given;
import static org.hamcrest.CoreMatchers.is;

@QuarkusTest
public class FibonacciResourceTest {

    @Test
    public void testEndpoint() {
       testFibonacci(0, 0);
       testFibonacci(1, 1);
       testFibonacci(2, 1);
       testFibonacci(3, 2);
       testFibonacci(4, 3);
       testFibonacci(5, 5);
       testFibonacci(6, 8);
    }
    private void testFibonacci(int number, int fibonacci) {
       given()
          .when().get("/fibonacci/"+ number)
          .then()
            .statusCode(200)
            .body(is(String.valueOf(fibonacci)));
    }
}
The test can be executed with the command ./mvnw test.
Build Application on APPUiO
For the application to run on APPUiO, a Swiss OpenShift platform, it must first be built. The Quarkus team provides an OpenShift Source-to-Image (S2I) build.
With the following command you can create a new build on OpenShift and start it automatically:
oc new-build quay.io/quarkus/ubi-quarkus-native-s2i:19.2.1~https://gitlab.com/nxt/public/quarkus-fibonacci.git \
  --name=quarkus-fibonacci-build
The GraalVM , which creates a native image from the Java code, needs a lot of computing power. In order for the build on APPUiO to acquire the needed resources, it has to be configured appropriately.
oc patch bc/quarkus-fibonacci-build \
  -p '{"spec":{"resources":{"requests":{"cpu":"0.5", "memory":"2Gi"},"limits":{"cpu":"4", "memory":"4Gi"}}}}'
The above command sets the build job limit to 4 CPUs and 4 gigabytes of RAM.
The great thing about APPUiO is that the resources needed for the build are not pulled from the project’s own resources. So you can push your own project to the limit and still run builds on OpenShift 😎.
The disadvantage of this approach is that the resulting docker image has a size of 600 MB 🤔. This is because the docker image contains the entire GraalVM. A Docker multistage build can solve this problem nicely.
The following docker file contains a multistage build where the native image is built first with GraalVM and after that a minimal docker image based on ubi-minimal is built.
## Stage 1 : build with maven builder image with native capabilities
FROM quay.io/quarkus/centos-quarkus-maven:19.2.1
COPY src /usr/src/app/src
COPY pom.xml /usr/src/app
USER root
RUN chown -R 1001 /usr/src/app
USER 1001
RUN mvn -f /usr/src/app/pom.xml package -Pnative -e -B -DskipTests -Dmaven.javadoc.skip=true -Dmaven.site.skip=true -Dmaven.source.skip=true -Djacoco.skip=true -Dcheckstyle.skip=true -Dfindbugs.skip=true -Dpmd.skip=true -Dfabric8.skip=true -Dquarkus.native.enable-server=true

## Stage 2 : create the docker final image
FROM registry.access.redhat.com/ubi8/ubi-minimal
WORKDIR /work/
COPY --from=0 /usr/src/app/target/*-runner /work/application
RUN chmod 775 /work
EXPOSE 8080
CMD ["./application", "-Dquarkus.http.host=0.0.0.0"]
On OpenShift, you can run multistage docker builds. The first of the following two commands creates the image stream for the new lean docker image and the second one creates the docker build.
oc create is quarkus-fibonacci
oc create -f - | << EOF
{
    "apiVersion": "build.openshift.io/v1",
    "kind": "BuildConfig",
    "metadata": {
        "labels": {
             "build": "quarkus-fibonacci-build"
        },
        "name": "quarkus-fibonacci-build"
    },
    "spec": {
        "output": {
            "to": {
                "kind": "ImageStreamTag",
                "name": "quarkus-fibonacci:latest"
            }
        },
        "resources": {
            "limits": {
                 "cpu": "4",
                 "memory": "4Gi"
             },
             "requests": {
                 "cpu": "500m",
                 "memory": "2Gi"
             }
        },
        "source": {
             "git": {
                 "uri": "https://gitlab.com/nxt/public/quarkus-fibonacci.git"
             },
             "type": "Git"
        },
        "strategy": {
             "type": "Docker"
        }
    }
}
EOF
Publish Application to APPUiO
The previously built application can be published on APPUiO with the following two commands:
oc new-app --image-stream=quarkus-fibonacci:latest
oc expose svc quarkus-fibonacci
The first command creates a deployment with a Pod and a corresponding service. The second command creates a route for the given service that makes the microservice available to the public.
The command below allows you to test the newly deployed application:
curl http://$(oc get route | grep quarkus-fibonacci | awk '{print $2}')/fibonacci/1
Set up Health Checks
Quarkus has an extension that offers health checks out of the box. If the extension has not yet been added to the project, it can be added with the command ./mvnw quarkus:add-extension -Dextensions=“health”. Quarkus will then automatically create health check endpoints that can be called via the URL /health/live and /health/ready.
In OpenShift the health checks can be added with the following command:
oc set probe dc/quarkus-fibonacci --liveness --get-url=http://:8080/health/live --initial-delay-seconds=1
oc set probe dc/quarkus-fibonacci --readiness --get-url=http://:8080/health/ready --initial-delay-seconds=1
Autoscaling
Quarkus applications can be started extremely quickly. This feature is especially useful when using the autoscaling feature. This allows you to start and stop pod’s dynamically when needed.
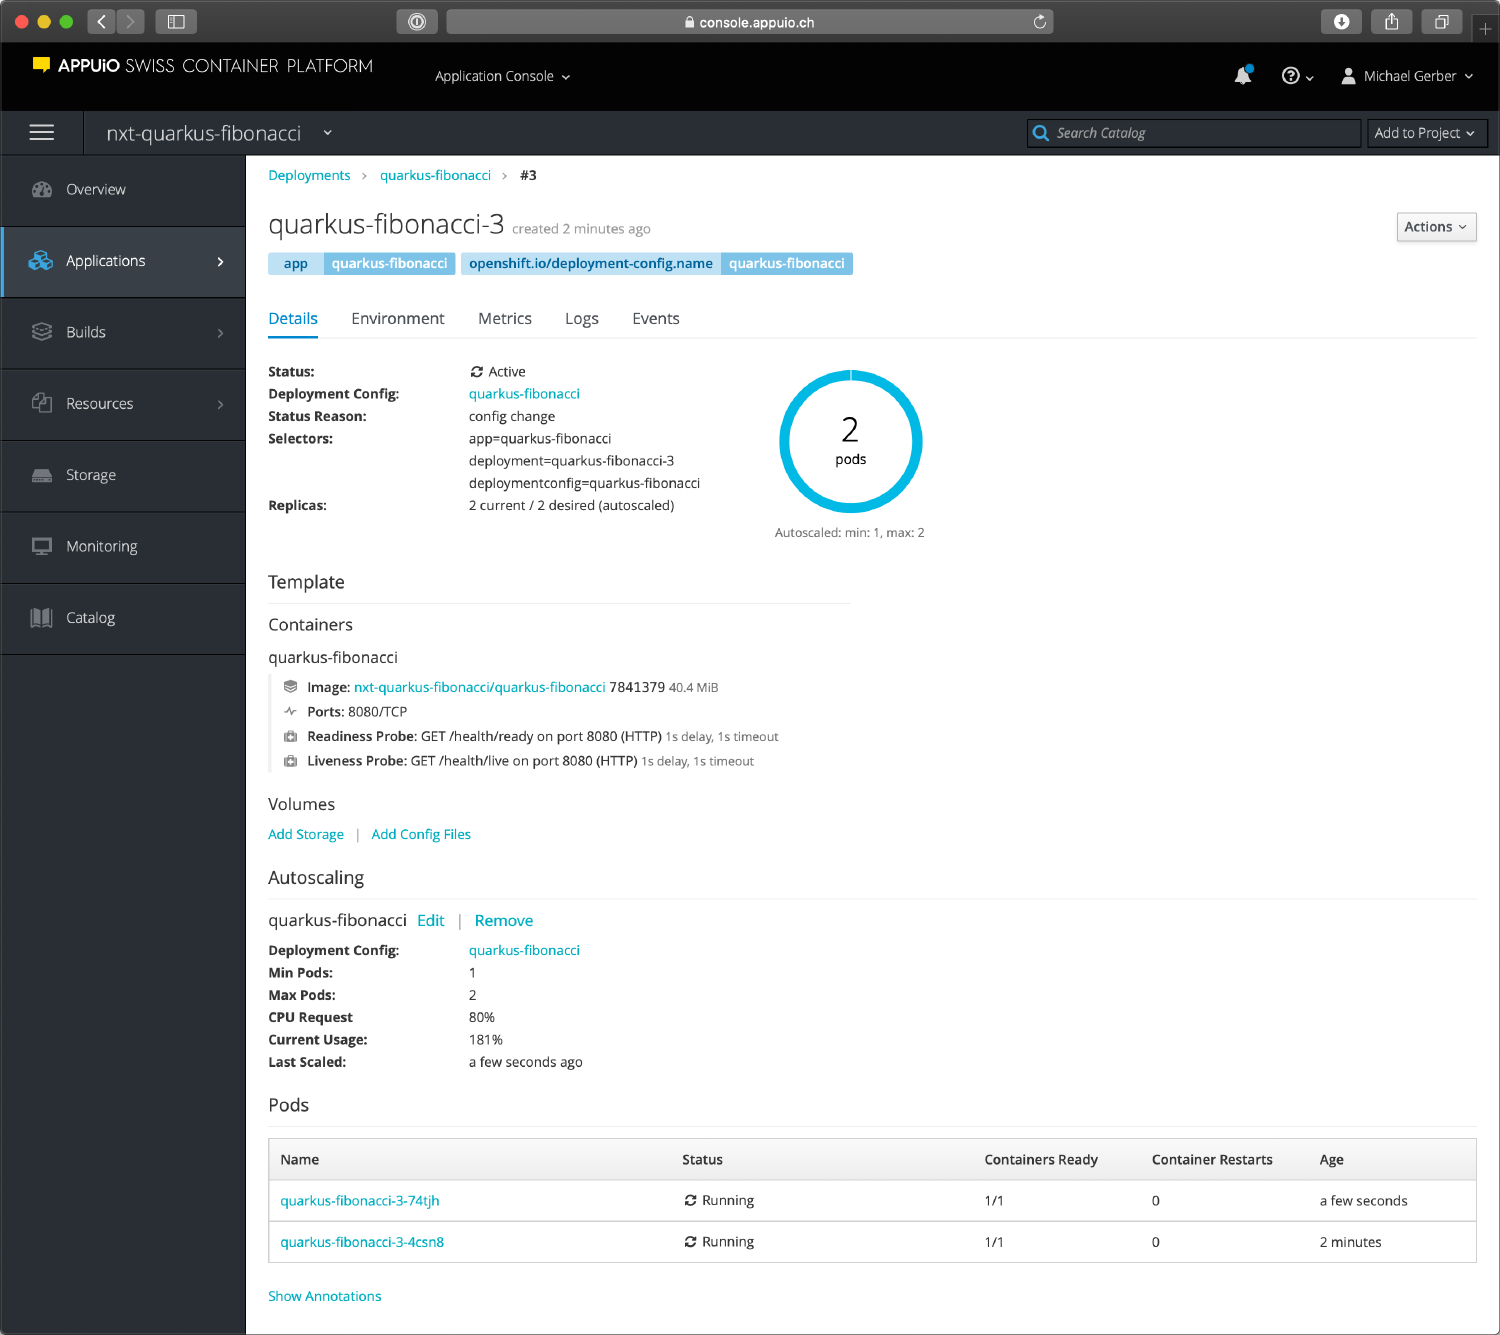
oc autoscale dc/quarkus-fibonacci --min 1 --max 2 --cpu-percent=80
The command above adds autoscaling, which starts a second Pod when needed. As soon as the load decreases again, the additional Pod is automatically shut down again.
Autoscaling can be tested with the ApacheBench tool from Apache.
ab -n 5000 -c2 http://$(oc get route | grep quarkus-fibonacci | awk '{print $2}')/fibonacci/30
This command sends 5000 parallel requests to the microservice. After a few seconds OpenShift will start the second Pod, which will be ready to use immediately.
 #### Conclusion
With Quarkus you can quickly and easily build a microservice with Java, which meets all requirements to be operated efficiently in an OpenShift or Kubernetes.
You can study the complete code on in GitLab repository .